Opening an Etsy shop? Its a great idea!
I have been maintaining 2 shops on Etsy for over a year now. One sells beads, jewelry supplies etc. and the other my finished creations made with beads, origami and other media I choose to work with. I learned a lot about Etsy by trial and error, research and stumbling on short cuts. A quote to embrace from the start is ‘If you don’t have time to do it right the first time, when will you have time to fix it’. The navigation on Etsy is cumbersome in regard to finding and editing your posted listings; therefore it is best to get it right or really close to right the first time.
One thing to consider before you begin. Your Etsy user ID cannot be changed. Your ID should be the same as your shop name to avoid confusion with your shoppers. And another consideration keep your shop name to 14 characters or less. tags in Etsy are limited to 14 characters, it is a good idea to put your shop name in one of the tags, if your shop name is longer than 14 characters (which one of mine is) you will not be able to enter it as a tag. I will get into this more further down. If you prefer to sell under one name and buy or chat under another I would suggest setting up two user IDs.
When considering your shop name make it catchy, easy to remember and relate in some way to what you plan to sell in your shop. If you plan to sell items that are different or unrelated consider selling them in two different shops. This will help make a cleaner shopping experience for your buyers overall. I have shoppers come to my beads shop and then look to see what I have done with the material I sell in my shop with finished goods. Referring your customers between your shops is always a good idea.
Next you will need a shop banner and an avatar for you user ID. Your avatar needs to be 75 x 75 pixels, your banner 760 x 100 pixels. Your banner is your branding, it will appear at the top of you shop pages. It should have your shop name and a tag line. You can look through shops on Etsy for ideas. Your avatar will also appear on each shop page in the right margin. If you do not know how to create your banner and avatar there are many talented graphic designers on Etsy that can do this for you for a modest fee.
Now you have you shop name, banner, avatar now set up a shop by following the prompts after clicking the ‘Sell’ link at the top of the Etsy home page. Once you have done that will need to populate information to the following links that appear on the left side of your ‘Your Etsy’ page. Begin with:
Public Profile – Here you will up load your avatar, enter the country and state/region you will be selling from, pin point your location on a google map, give a bio about yourself, your gender and birth date, a list of your favorite materials and select if you want to display favorite items in your profile. Click save changes when all info is filled in. The go to the following link.
Appearance (the first link under shop set up) - Enter your shop title. This should be search tags as this line is read by search engine spiders, therefore a message or greeting here will not help drive traffic to your site. You shop title should be things like: jewelry, baby items, soap, etc. use words people are likely to searching the net by. These words will appear right under your banner. Next upload you banner image. Then write your shop announcement. I suggest keeping your shop announcement short so that people viewing your shop will see pictures of products without having to scroll down. Details and additional information can be placed under policies section. Now select you alchemy status, alchemy is Etsy way of saying custom I know this is confusing, but I didn’t choose the name. Allowing private requests allows someone to contact you privately regarding a custom job. Under Alchemy Announcement you will put information you customers will need to know regarding placing a custom order with you. I.e. colors or styles available, how long custom orders generally take, etc. Save changes and move onto the policies link.
Policies – Here you will write you welcome greeting in the ‘welcome’ box. Under that you can advise you customers of you payment policies. Under that your shipping information. Followed by your refund and exchange policy and finally there is a place for any additional information you want tp have available to you customers. Save changes.
Sections – You can have 10 sections in your shop on Etsy. If you think you will use that many plan carefully so that you will have sections that will encompass all your items. Section titles should be search tags as well. Something else to consider, if you set your sections up using the ‘sections’ link on the ‘your Etsy’ page your section titles will be limited to about 25 characters. If you require longer titles I suggest NOT setting up your sections here, there is a link for you to ‘create new section’ on page 4 when listing an item, I will go into that in that section further on. If 25 characters is plenty for you the set up your sections now. Remember to save you changes, if any before moving onto shipping options.
Here you can create shipping profiles for items in your shop. You may want to set them up by weights or by size or by price of the goods sold. These profiles can be selected when your listing an item making populating shipping information easy, quick and consistent.
Payment Method – Follow the prompts to select the methods of payment you are willing to accept. Remember to save.
Vacation Mode – Selecting ‘vacation on’ will make all the items in your shop inactive. You can populate a text box with a vacation announcement and another text box with automatically reply to convos sent to you while on vacation.
Web Analytics – When you set up a google analytics account the tracking ID is entered here.
Once all of this is completed your ready to begin listing product to your shop! For listing you will need up to 5 photos of your item. Take clear pictures in uncluttered settings from multiple angles. Remember this is the only way for your customer to experience your item. Crop your photos tight, be sure your 1st photo you will be using for each listing looks good as a thumbnail image. Once you pictures are cropped and loaded into your computer your ready to begin listing.
On the left side of the ‘your Etsy’ page under the ‘items’ heading click the ‘add item’ link. You will first be asked to enter a title.
Title – This line is read by search engine spiders therefore the title should contain words that would be used to search in search engines.
Description – Describe your item. Size, color, weight, shape, condition, material used to make it and any other pertinent information you customer may need to know to make a decision.
Materials – List the materials used in making the item. Click next the category page will appear.
The first selection will be the best overall category your item fits into. Possible suggestions for the next category will appear. Select anything that applies to your item. Remember you have 14 ‘tags’ here include size, shape, colors, your shop name. Does your item relate to day or evening? Is it formal or casual? Does it relate to a holiday or a season? Include anything that accurately describes or relates to your item and may bring in potential buyer. Click next the ‘selling info’ page will appear.
Selling Info - First on this page is price – remember not only time and cost in creating your item, but also listing fee, PayPal fees, packaging costs and any other non direct cost associated with selling or shipping your items.
Enter price
Enter quantity available, remember you will be charged the number of listing fess as quantity entered. I.e. 20c fee, 5 items available = $1.00 fee.
Section – Select a section from the drop down menu if you set up sections previously. If you have not click the ‘Add New Section’ link. A section title will open up. Here is where you can enter a section title with seemingly unlimited characters.
Shipping – You choose a saved shipping profile from the drop down menu or set up a new profile from the link to the right of the drop down menu. You can also manually select country of origin and ship to countries and prices if you prefer. Simply follow the prompts. Click next. The ‘images’ page will appear.
Images – Click ‘choose file’ select file to be uploaded. Click up load. Repeat this up to 4 more times to load your item photos. You can use the blue arrows under the photos to change the order of the photos. Click next when done uploading photos. The preview page will appear. Review your listing, if you need to make any changes use the edit icons. When done, click finish and your item will be live in your shop on Etsy.
I will be posting other tips, info, promotions ideas and more so check back. If you have any questions feel free to contact me. See Contact Me to right.
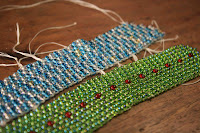
 I consider the creative process meditative, whatever the medium, especially when the process flows naturally without much conscious thought. Repetitive processes particularly take on this aspect. If nothing else peyote stitch is repetitive.


